Table of Contents
picoUVX
The picoUVX is a highly efficient, mobile 10W UV-Exposer unit, based on modern LED technology and a very efficient, yet simple step-up switch mode supply design, with a low conversion loss of about 7% (93% efficiency). It's the first member of the picoFab family, to make off-grid development of fine pitch PCB's possible anywhere, using just 12VDC/0.83A (10W).
Emitter-Unit
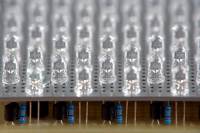
LEDs
Most photo-positive PCB materials (especially Bungard) react well to a wavelength of about 400nm. Whichever LED may be used, its dominant wavelength is far more important than its output intensity.
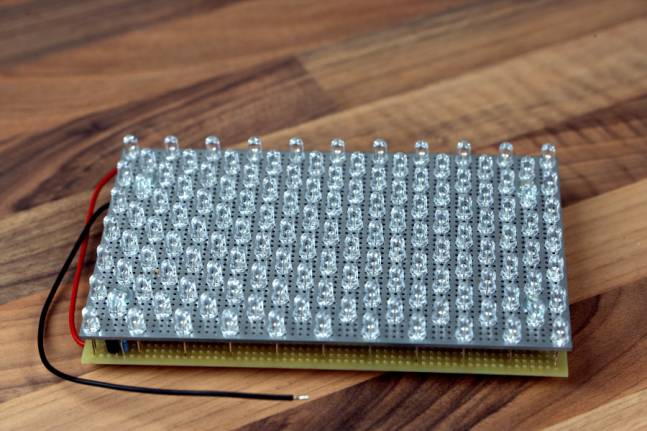
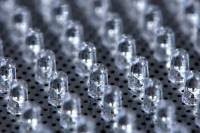
The LEDs for this unit were bought here and then hand-selected on a breadboard to avoid soldering DoA LEDs and to sort out obvious low-performers, so that all 137 LED's will emit a balanced output over the whole light forming surface.
UV LEDs Specs
| Manufacturer | Shine |
| Part No. | A-02-24-UV |
| Dice | InGaN |
| Lens Color | Water-Transparent |
| Diameter | 5mm |
| Luminous Intensity | 2.000mcd |
| Viewing Angle | ~20° |
| Wavelength | 400nm (typ.) |
| Forward Voltage | 2,8-3,4V (3,2V typ.) |
| Forward Current | 30mA (max.) / 20mA (typ.) |
| Operating Temp. | -25°C - 60°C |
| MTBF | > 100.000H |
The emitter-array's output intensity is about 274 candela, the approximate luminous flux is about 25 lumen. Although the purple glow is fascinating to watch, it can hurt your eyes. NEVER LOOK DIRECTLY INTO THE LIGHT, without uv-protective eye cover.
Constant current source chains
To keep the lighting of the LED's evenly balanced and to protect the LED's from destruction or shortened lifespan it's important to use a constant current supply.
The simplest form is just a resistor, but experiments showed uneven lighting and unstable currents with changes in temperature. Further experiments were done with two bipolar transistors (BC546) but that worked even less reliable on different chains.
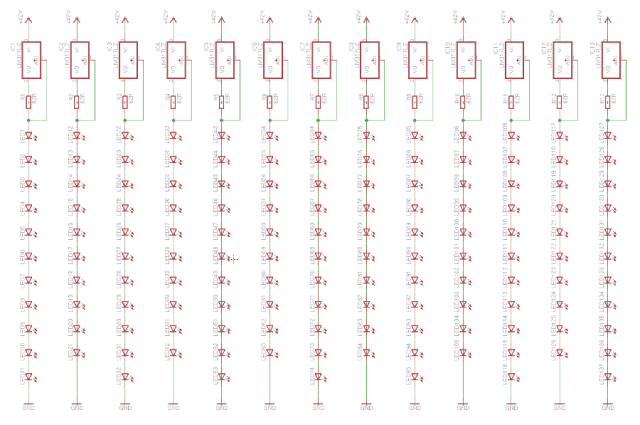
Another simple approach, proposed on mikrocontroller.net, is to use a LM317 and a shunt resistor as constant current source, which works very well and seemed to be the most simple but reliable solution to power the separate chains while still being cheap enough.
Shunt resistor calculation
Combining an LM317 and a 62 Ohm shunt resistor regulates the current flow to 20mA per chain, running the LED's at their typical recommended operational forward current to maximize the lifespan but leaves room to increase the current if exposure times need to be shorter. If you don't have 62 ohm resistors on site, just use 68 ohm (18mA per chain). The input voltage must be at least 3,5V + sum(Uf,LED) (Uf=Forward Voltage,LED).
Schematic
Layout
The prototype was built on a perfboard, there is no layout done yet. If you have time and want to do something useful, here is your chance. Feel free to checkout the package and come up with a new layout proposal.
Sandwich system
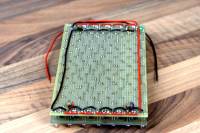
Upper PCB acting as spacer/reflector, lower PCB to host the constant current sources for each chain and to solder the LED's. This will minimize the possibility of solder damage (more distance to the LED emitter through longer legs) leaving enough space for air to blow through the whole emitter array. Although the system doesn't get hot, it's still getting warm, that could negatively influence the lifetime of the LED's.
Power-Supply-Unit
Using this many LED's in a current controlled environment and a 12V power supply usually tends to result in a higher BOM count since a serial configuration will only power 3-4 LED's per chain. One alternative would be to use a parallel configuration, which is strongly discouraged, as there is no control over the LED's internal resistance and therefore the current flowing through it.
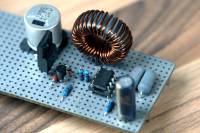
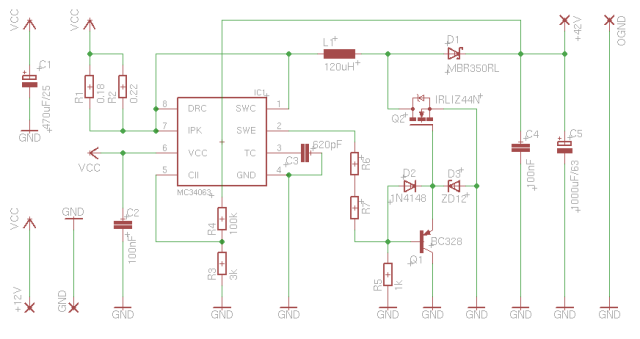
The most efficient solution seemed to be a switch-mode step-up (boost) voltage converter, transforming 12V DC up to 42V DC, which makes a serial configuration of up to 11 LED's per chain possible. This design is based on the widely available MC34063 switch-mode controller IC you can even rip off at electronic trash sites, since it's cheap and a very popular controller in chinese electronics.
Specs
Schematic
Layout
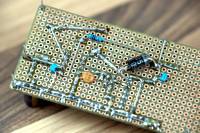
The prototype was built on a perfboard, there is no layout done yet. If you have time and want to do something useful, here is your chance. Feel free to checkout the package and come up with a new layout proposal. The MC34063 switches at about 25kHz, which makes it an ideal beginner's device to learn about switch-mode power supplies. The prototype is working perfectly on a perfboard, so the layout shouldn't be too hard to accomplish.
The following rules should be regarded as basic rules for switch-mode power supply layouts:
- Place the coil, schottky diode, switch and the IC as close together as possible.
- Consider the heat dissipation of each component and try to optimize the placement.
- Trace a ground-plane around all components (mandatory on higher frequencies).
- Use SMT whenever possible (mandatory on higher frequencies).
BOM
| R1 | 0.18 | 1W |
| R2 | 0.22 | 1W |
| R3 | 3k | .25W |
| R4 | 100k | .25W |
| R5 | 1k | .25W |
| C1 | 470uF/25 | Low-ESR |
| C2,C4 | 100nF | |
| C3 | 620pF | |
| C5 | 1000uF/63 | Low-ESR |
| D1 | MBR350RL | Fast-Switching Schottky Diode |
| D2 | 1N4148 | |
| D3 | ZD12 | Zener Diode |
| L1 | 120uH | DIY 120uH Coil (33 windings) |
| IC1 | MC34063 | MC34063 Switch Controller |
| Q1 | BC328 | PNP Transistor |
| Q2 | IRLIZ44N | N-Channel low-RDSon MOSFET |
Increasing Efficiency
The trick to get more than 90% efficiency out of the MC34063 seems to be a very high Q inductor (L1). At first L1 was wound on a yellow/white core came out of a broken ATX supply and achieved only about 78% efficiency. After winding a new inductor onto one of these VITROPERM cores from VAC, it increased to 93%, which is more than just considerable. There are likely to be other high-efficiency SMPS projects to come in the future where VITROPERM cores may offer substantial benefits compared to others. Time and testing will show.
Controller
After the casing is finished, the next step is to develop a small ATMega based controller to act as timer and for additional safety, to control and monitor the cooling Fan's. It will also disable the UV-Emitter unit, when the casing's lid is opened, to reduce the risk of accidental eye injuries.
Case
Exposure Glas
Needs to be robust, and must not absorb UV-light, many glasses/acryl types do. This one is specially designed for solariums: EVONIK Industries (4/2458).
Light Forming
Combination of Diffusor/hexagonal grid like it's used in photo/film setups to achieve evenly illuminated, very straight light. This is an experimental development, that may enhance the structural resolution of the exposed film on the PCB for finer pitches.
Kits
Once it's finished/tested and enough people demand a kit, instead of building it completely by themselves, we'd like to put something together in SMT. Buying parts in larger quantities will lower the price any individual can achieve.
Test-Sheet
TODO
- Create CAD files to build a simple but effective case with acryl/plexiglas on a lasercutter
- Use two 60mm FANs to cool the emitter unit (prolong LED life)
- Build a uC controller/timer (incl. safety-turn-off for the emitter when the lid is opened)
Repository
Grab the latest schematics, code and all related files:
Anonymous GIT Pull
git clone git://apollo.open-resource.org/picouvx
If you want to add files or commit changes to the files in the repo, send your work to the OPS-Team or apply for RW git access by sending your pub-key to the OPS-Team.
![[[:lab:resources:picouvx-pcb-layout-helper-v1.0.svg|PCB Layout Processing Test-Sheet]] [[:lab:resources:picouvx-pcb-layout-helper-v1.0.svg|PCB Layout Processing Test-Sheet]]](/_media/lab:resources:picouvx-pcb-layout-helper-v1.0.png?w=250&tok=eba831)